
Get Your Instant Quote Now!
Get Started
Installing vinyl fascia over wood is one of the most effective ways to protect your home's roofline from moisture, rot, and weather damage — without a full tear-out.
Here's a quick overview of how it works:
Yes — you can install vinyl fascia directly over existing wood without removing it, as long as the wood underneath is solid and free of rot.
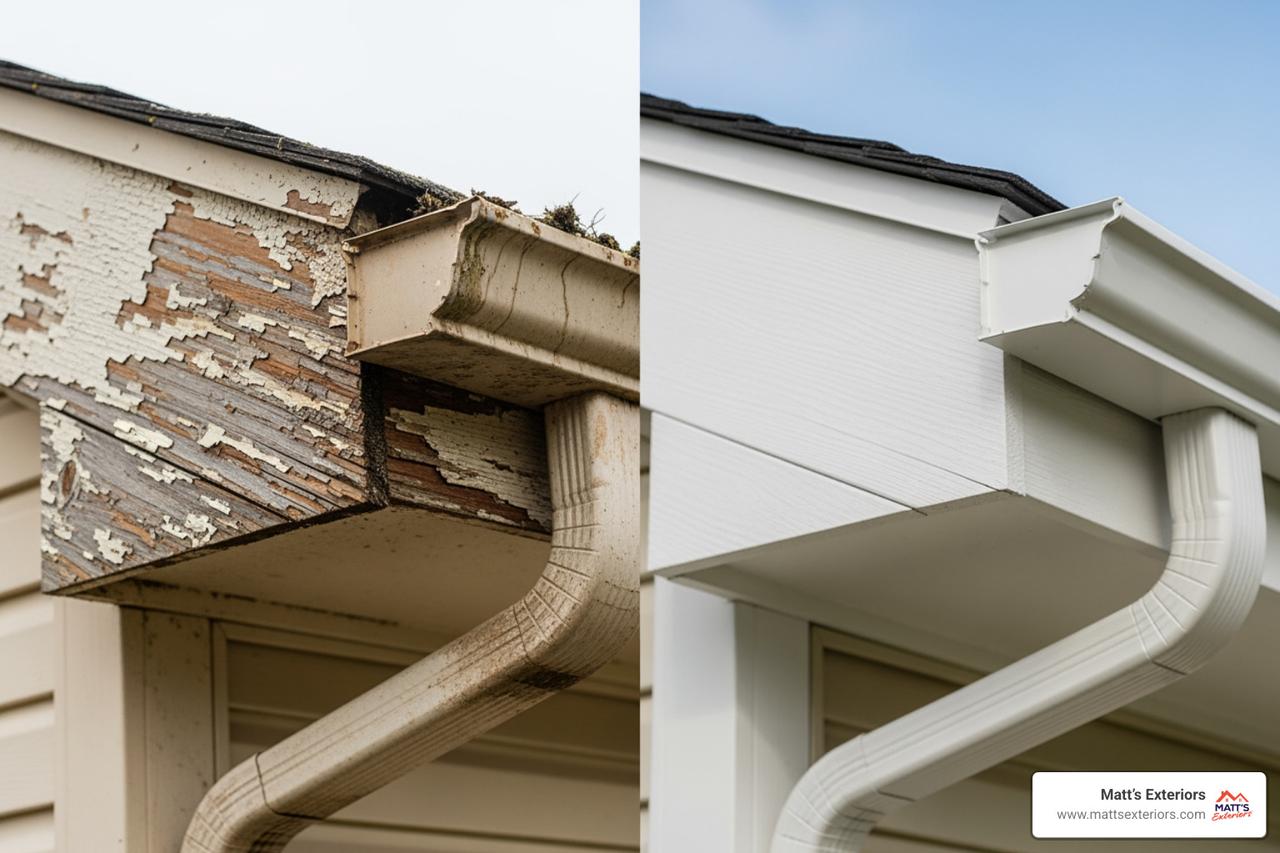
The result is a clean, low-maintenance exterior that protects the wood beneath from rain, UV rays, and pests for decades.
For Metro Atlanta homeowners, this is a smart upgrade. The humidity here is hard on exposed wood trim. Vinyl acts as a durable shell that seals out moisture before it ever reaches the structure underneath.
It's also budget-friendly. Vinyl fascia installation typically runs $5–$12 per linear foot, making it one of the most cost-effective exterior upgrades you can make.
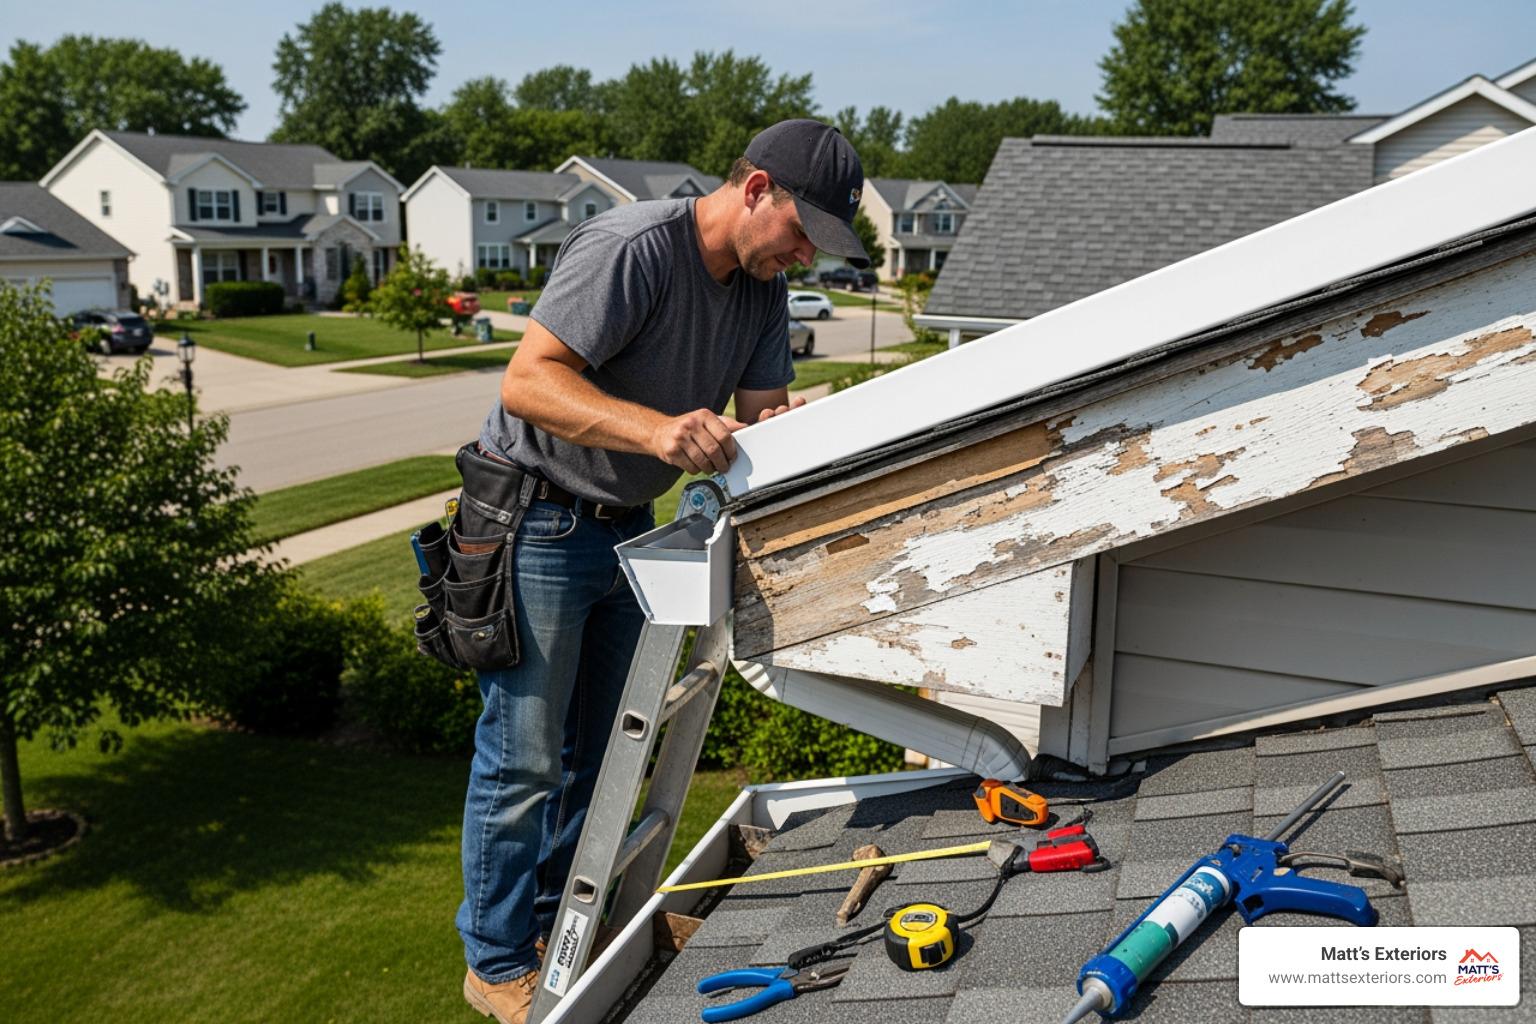
If you've spent any time on a ladder with a paintbrush in one hand and a scraper in the other, you already know why wood fascia can be a headache. In our neck of the woods--from Marietta down to Peachtree City--the Georgia humidity is relentless. Wood fascia boards are the front line of defense for your roof, but they are also highly susceptible to the elements.
When we talk about installing vinyl fascia over wood, we are essentially talking about "wrapping" your home in a protective, maintenance-free suit of armor. Vinyl fascia is made from durable polyvinyl chloride (PVC), which doesn't care about rain, wind, or the scorching Southern sun.
Feature Wood Fascia Vinyl (PVC) Fascia Aluminum Fascia Initial Cost Low ($1-$3/ft) Mid ($3-$7/ft) Mid-High Maintenance High (Painting/Scraping) Very Low (Washing) Low Durability Prone to rot/pests High (Won't rot) High (Can dent) Lifespan 15-20 years (if maintained) 20-30+ years 25+ years
Before we get our hands dirty, we need to make sure the toolbox is stocked. Installing vinyl fascia over wood requires a few specialized tools that you might not have in your standard kit. Using the right gear is the difference between a professional finish and a DIY disaster that blows off in the next thunderstorm.
Ready to start? We’ve broken this down into a manageable process. The goal here is to create a "floating" system. Because vinyl expands and contracts as temperatures change—something we see a lot of in Georgia—you can't just nail it down tight like a piece of wood.
Before you cover anything up, you must be certain the "bones" are good. The wood board currently on your house is called the sub-fascia. If it’s soft, crumbling, or infested with pests, covering it with vinyl is like putting a band-aid on a broken leg. Check the rafter tails too. If you find rot, you’ll need to handle those repairs before proceeding.
To do this right, the gutters have to come down. It’s nearly impossible to tuck fascia behind gutter brackets and get a watertight seal. This is actually a great time to consider a full gutter replacement if yours are sagging or leaking.
Once the gutters are off, follow these steps to prep the surface:
Vinyl moves. On a hot July day in Atlanta, a 12-foot piece of vinyl can grow significantly. If you don't leave room for this, the fascia will "oil can" or buckle, creating ugly ripples.
Now for the fun part—putting the pieces together.
Corners are where the pros are separated from the amateurs. A sloppy corner is a highway for water to get behind your new trim.
We don't recommend using "cap" pieces if you want a high-end look. Instead, fabricate your own.
When you reinstall your gutters, pay close attention to the pitch. Gutters should slope toward the downspouts at a rate of about 1/4 inch for every 10 feet.
Technically, it is possible, but we don't recommend it. Gutter brackets are usually screwed directly through the fascia into the rafters. If you try to slide vinyl behind them, you'll likely crack the vinyl or fail to get it into the top locking trim. For a professional, watertight result, the gutters need to come off so the fascia can be fully encased.
Buckling is almost always caused by "face-nailing" (driving nails through the flat front of the panel) or failing to leave expansion gaps. By using the snap-lock method and leaving a 1/4-inch gap at the ends of your runs, you allow the material to move freely. Think of it like a bridge—it needs room to breathe!
Installing vinyl fascia over wood is significantly cheaper than a full replacement with premium materials like fiber cement or cedar. Because you are using the existing wood as a substrate, you save on material disposal and heavy labor costs. Plus, once the wood is wrapped, it's protected from the moisture that causes rot, effectively "freezing" its condition in time.
At Matt’s Exteriors, we’ve seen how the Georgia weather can beat up a home’s exterior. Whether you’re in Cumming, Alpharetta, or Fayetteville, your home’s fascia is a critical component of your roofing system. By choosing to cover your old wood trim with high-quality vinyl, you’re investing in lifetime durability and curb appeal that lasts.
We’ve completed over 12,000 projects since 2007, and our family-owned team is dedicated to providing the high-quality workmanship Metro Atlanta homeowners deserve. If the thought of climbing a ladder to scrape and paint your fascia one more time makes you tired, let us handle the heavy lifting.
Schedule your professional siding services today and give your home the protection it needs!