
Get Your Instant Quote Now!
Get Started
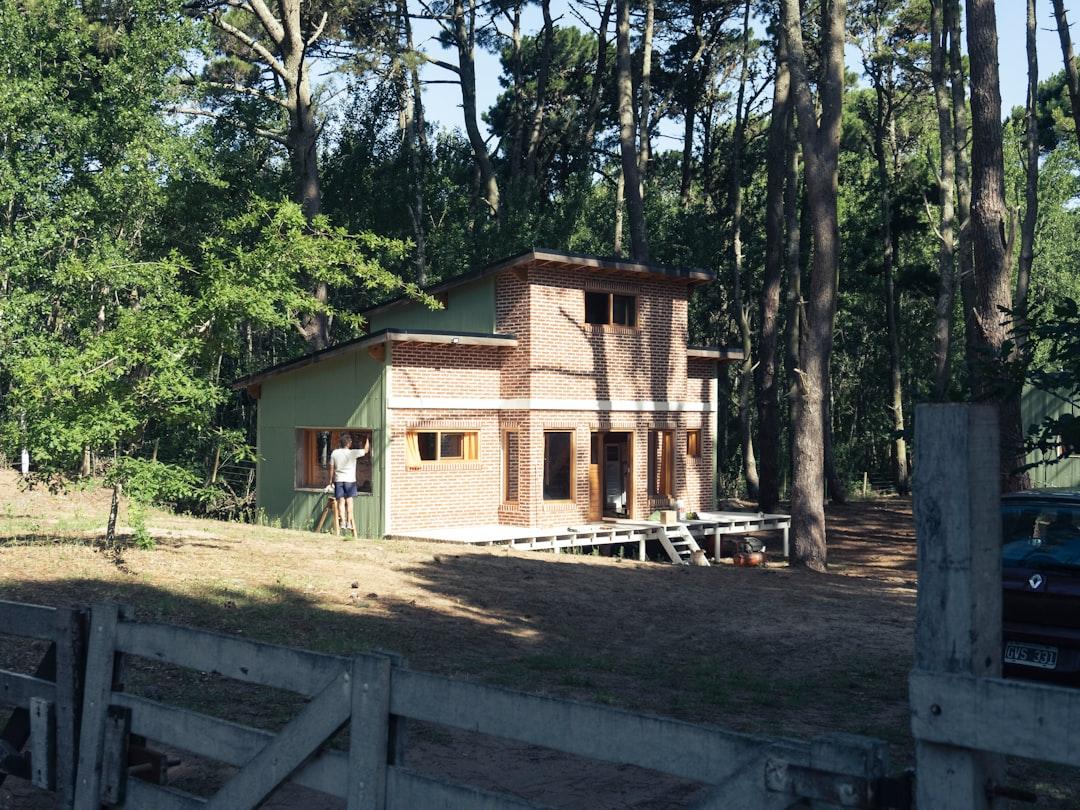
Replacing wood siding on house exteriors is one of the most important repairs you can make to protect your home's structure, appearance, and value.
Quick answer: Here's when and how to replace wood siding:
Wood siding looks great — but it has a real weakness: moisture. Over time, rain, humidity, and poor drainage can cause boards to rot, warp, or crack. Left alone, the damage spreads fast and can reach the sheathing and framing underneath.
The good news? You don't always need to replace everything. If the damage is isolated, replacing just the affected boards can save you thousands of dollars and restore your home's curb appeal in a weekend.
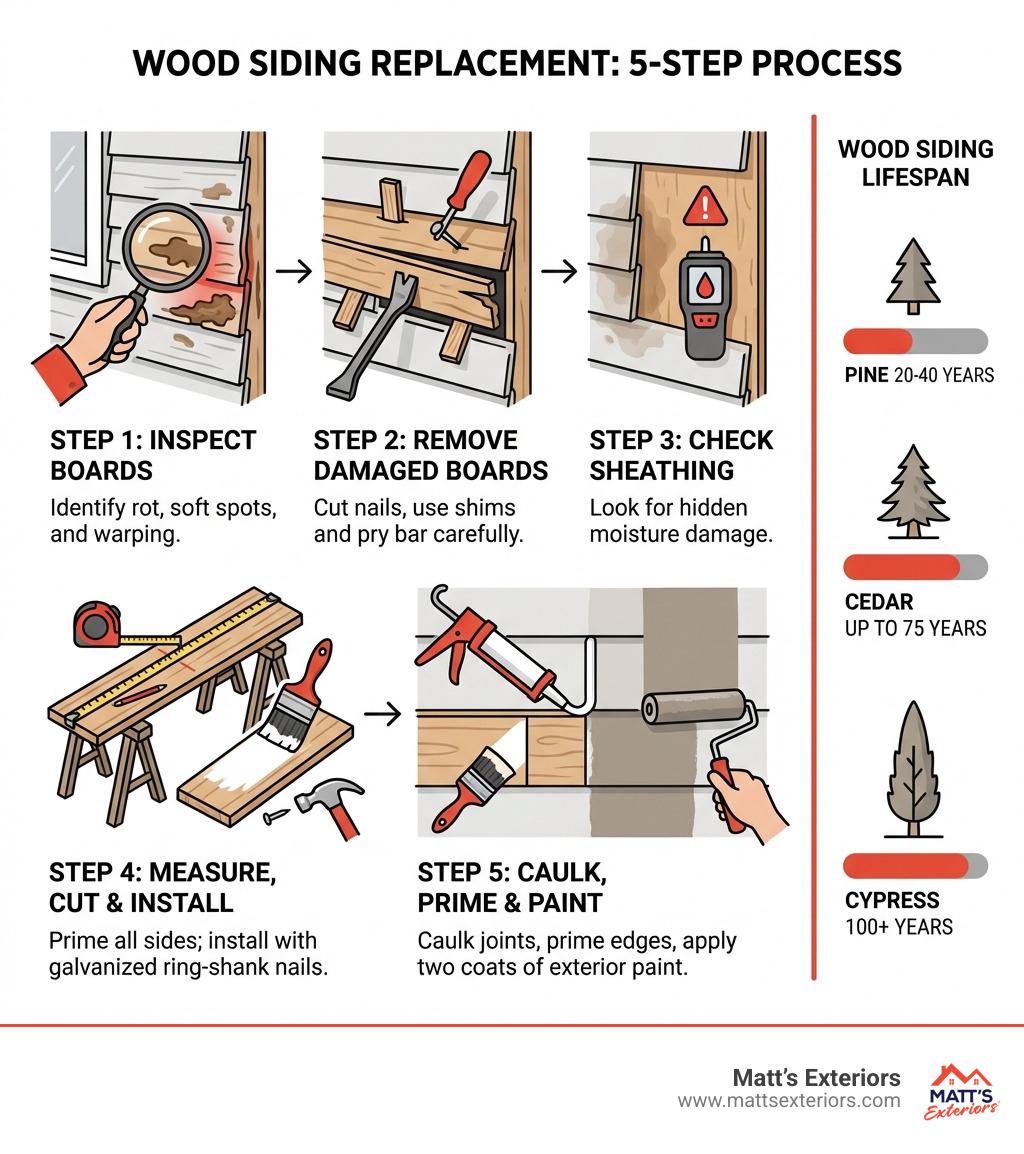
With proper maintenance, wood siding lasts 20 to 40 years. Premium species like cedar can last up to 75 years, and cypress can exceed 100 years — but only if damage is caught and fixed early.
This guide walks you through everything: how to spot trouble, how to remove and replace boards the right way, and how to keep your siding lasting as long as possible.
Before you grab your hammer, you need to know exactly what you’re looking for. In Metro Atlanta, our high humidity and heavy summer storms can be brutal on natural wood. We often see homes in Marietta or Alpharetta where the siding looks fine from a distance, but a closer look reveals a different story.
Start by walking the perimeter of your home. Look for the obvious: peeling paint, cracks, or boards that seem to be pulling away from the wall. Pay extra attention to areas near the ground, around chimneys, and where the siding meets the roofline. These are the "hot zones" for moisture.
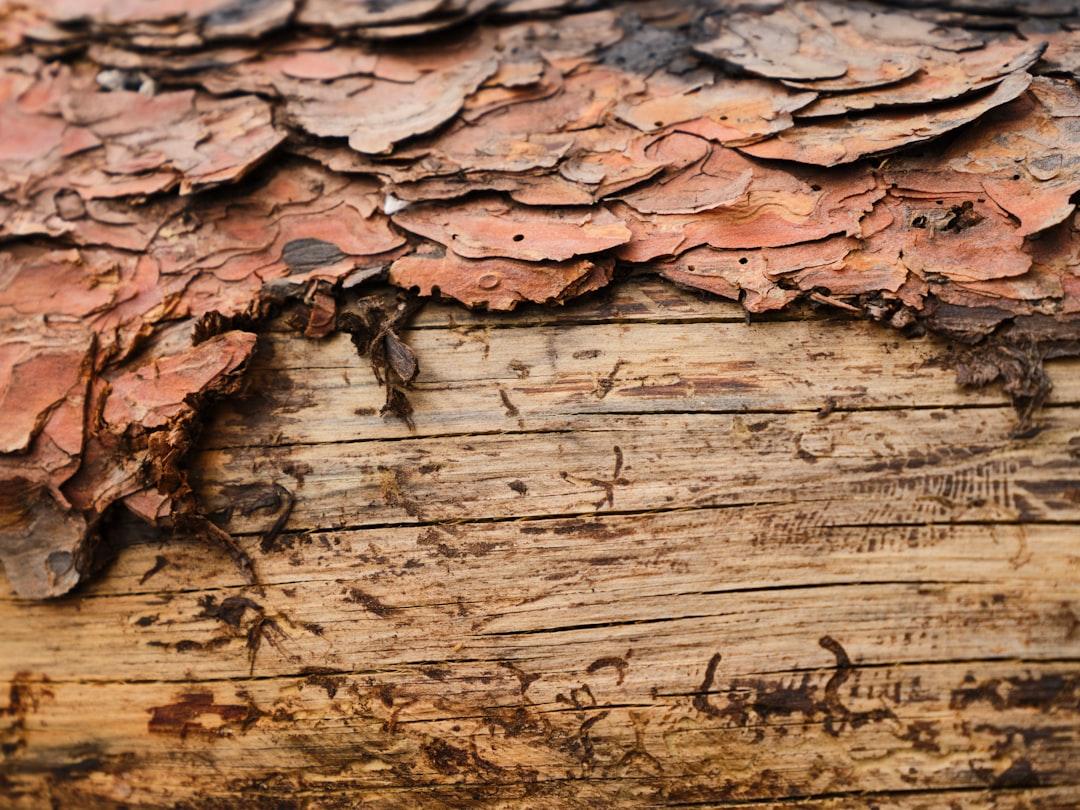
If you see a spot that looks discolored or "fuzzy," don't just look at it—give it a poke. Use a screwdriver or a sturdy putty knife to gently press into the wood. If the wood feels soft, spongy, or the screwdriver sinks in easily, you’ve found dry rot or fungal growth. This is a clear sign that replacing wood siding on house sections is no longer optional.
To do this job right, you need more than just a standard toolbox. If you’re planning on replacing wood siding on house boards yourself, having the right gear is the difference between a "seamless repair" and a "messy patch job."
Not all wood is created equal. Depending on your budget and how long you plan to stay in your home, you have a few options. Here is a quick comparison of the most common types of wood siding and their vulnerabilities:
Wood Type Durability Best For Lifespan (Maintained) Cedar High Rot & Insect Resistance 75 Years Cypress Very High Maximum Longevity 100+ Years Pine Moderate Budget-Friendly 20-40 Years Redwood High Aesthetics & Durability 50+ Years
If you’re unsure which material is currently on your home, we can help. Check out more info about siding services to see how we match existing materials.
Replacing a section of siding is a surgical process. You want to remove the "tumor" (the rot) without hurting the "patient" ( the rest of your house).
The biggest mistake DIYers make is trying to rip the boards off with a hammer. This almost always cracks the boards above the damage. Instead, follow this pro-tip: work from the top down if you are removing multiple courses. This exposes the nails of the board below, making it much easier to pull.
Once the old board is out, don't just rush to put the new one in. Take a moment to inspect the sheathing. Is the house wrap intact? Is there any moisture damage on the structural plywood? If the "bones" of the house are soft, the new siding won't help. This is also a great time to consider if your windows need attention, as siding and window leaks often go hand-in-hand. You can find more info about window installation if you suspect the leak is coming from the casing.
For a deeper dive, you can refer to this step-by-step siding replacement guide for visual aids on overlapping.
The "secret sauce" to a repair that lasts 50 years instead of 5 years is the finish.
After the boards are installed, you'll want a professional paint job to blend the new with the old. Check out more info about exterior paint to ensure your colors match perfectly.
Let's be honest: wood siding is beautiful, but it's a lot of work. If you find yourself replacing wood siding on house sections every few years, you might want to consider a "set it and forget it" alternative.
This is the gold standard in Metro Atlanta. Made from a mix of cement, sand, and cellulose fibers, it is virtually indestructible.
This material uses wood strands coated in wax and resin for moisture resistance. It’s lighter than fiber cement and easier to install, but offers much better protection than traditional wood.
Many of our customers choose to upgrade their siding at the same time they are doing a roof replacement, as this allows for a total refresh of the home's "envelope."
In our experience serving the Metro Atlanta area, Cedar is the top choice. It contains natural oils that act as a built-in preservative against rot and insects. While it’s more expensive than pine, its 75-year potential lifespan makes it a better long-term investment. If you want the absolute "forever" siding, Cypress is incredible, often lasting over 100 years, though it can be harder to source locally.
The cost varies wildly depending on the scale.
We get asked this a lot, and our answer is almost always no. While it might save money upfront, it’s a recipe for disaster. Installing new siding over old traps moisture between the layers, which will accelerate rot in your home’s structural sheathing. Plus, you lose the opportunity to inspect the "bones" of your house for termites or water damage. A professional job always starts with a clean slate.
Replacing wood siding on house exteriors doesn't have to be a nightmare. Whether you’re tackling a single rotted board over a weekend or realizing it's time for a full-home transformation, the key is attention to detail.
At Matt’s Exteriors, we’ve seen it all. Since 2007, we’ve completed over 12,000 projects across Metro Atlanta—from the historic homes of Marietta to the modern builds in Suwanee. We are a family-owned company that believes in high-quality workmanship and using only the most trusted materials. We treat your home like it’s our own, ensuring that every board is primed, every nail is set, and every joint is sealed.
If you’re seeing the signs of rot or warping, don't wait for the next big Georgia thunderstorm to turn a small repair into a major structural headache.
Ready to restore your home's beauty and protection? Schedule your professional siding services today and let us give your home the "Bill of Health" it deserves.