Why Vinyl Siding Repair Matters for Your Atlanta Home
Vinyl siding repair is the process of fixing damaged exterior siding panels — whether from cracks, holes, warping, or impact — to protect your home from moisture, pests, and energy loss.
Quick answer: How to repair vinyl siding
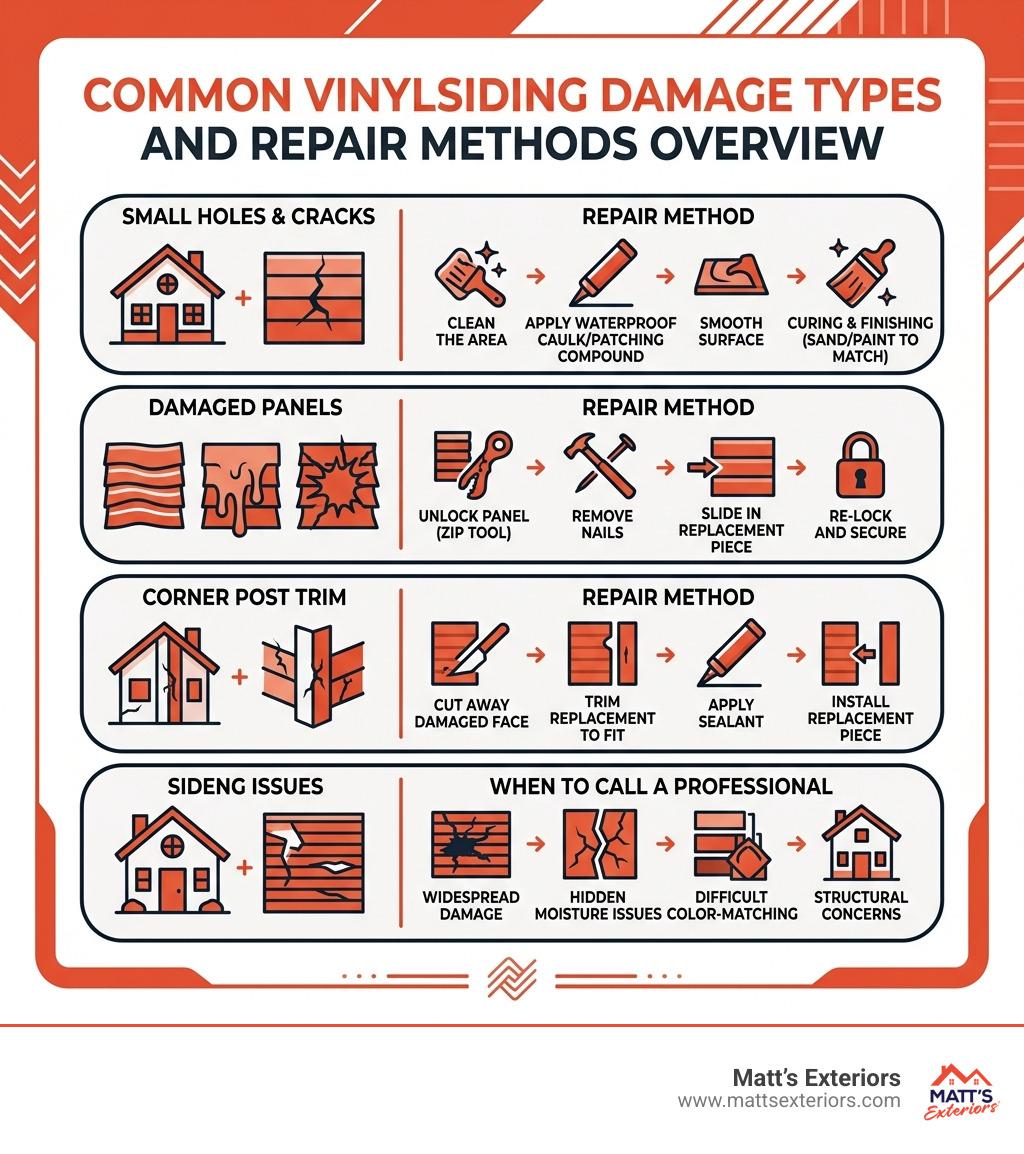
Small holes and cracks — Clean the area, apply waterproof caulk or vinyl patching compound, smooth, let cure, sand, and paint to match.
Damaged panels — Use a zip tool to unlock the panel, remove nails, cut and slide in a replacement piece, then re-lock and secure.
Corner post trim — Cut away the damaged face, trim a replacement to fit, apply sealant, and install.
When to call a pro — Widespread damage, hidden moisture, color-matching issues, or structural concerns.
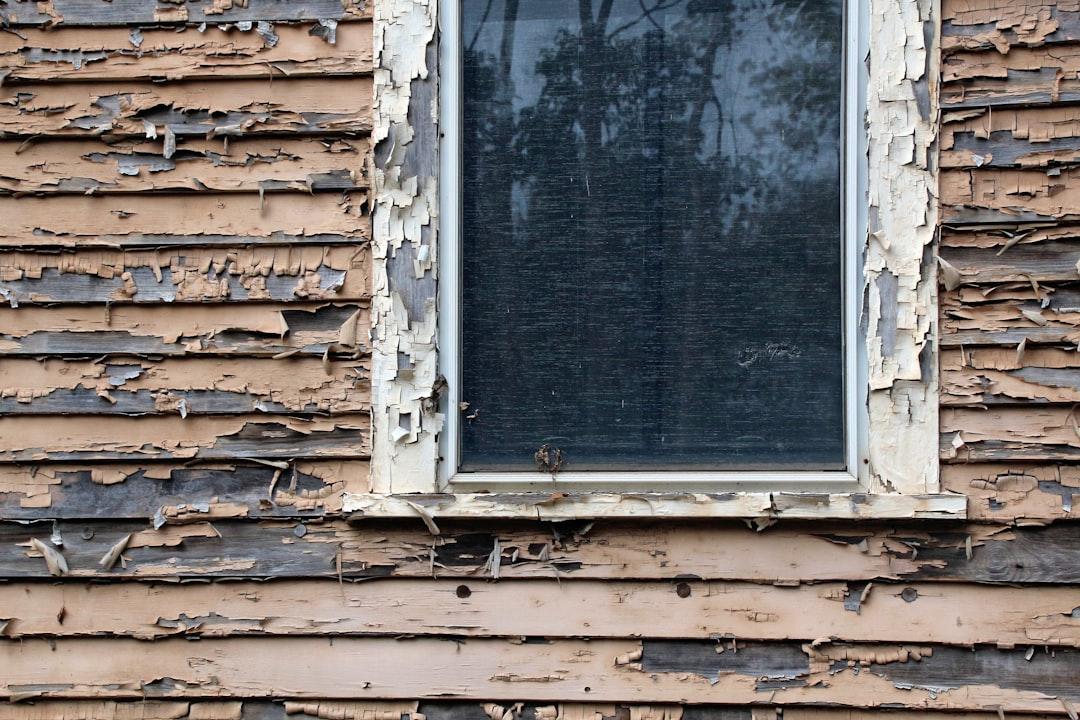
Vinyl siding is tough — but it's not invincible. Georgia's heat, humidity, and storm season put real stress on your home's exterior. A cracked or warped panel might seem like a small cosmetic problem, but left alone it can let moisture seep behind the wall, invite pests, and quietly cause rot or mold damage that costs far more to fix.
The good news? Many vinyl siding repairs are beginner-friendly, take under two hours, and cost as little as $50 in materials.
I'm Matt Lopez, founder of Matt's Exteriors, and with nearly two decades of experience in exterior remodeling across Metro Atlanta — including siding installation, repair, and moisture barrier work — I've seen how a timely vinyl siding repair can save homeowners thousands. Let's walk you through exactly how to handle the most common issues, step by step.
Identifying Common Types of Vinyl Siding Damage
Before we grab our tools, we need to know what we’re looking at. In our experience serving areas from Marietta to McDonough, we’ve found that Atlanta’s unique climate plays a huge role in how siding fails. As of April 2026, we are seeing a trend of older vinyl becoming increasingly brittle due to the intense UV exposure of previous summers.
Here are the most common culprits:
Impact Damage: This is the "oops" category. A stray baseball in Alpharetta, a rock kicked up by a lawnmower in Duluth, or a sudden hailstorm can leave punctures or spiderweb cracks in your Exterior House Siding.
Thermal Expansion and Buckling: Vinyl is designed to move. However, if it was nailed too tightly during installation, it can’t expand when the Georgia sun hits it. This leads to buckling or "oil canning," where the panels look wavy.
Melting: Believe it or not, high-efficiency windows on a neighbor's house can reflect sunlight like a magnifying glass, literally melting the siding on your home.
Cracks and Brittleness: As vinyl ages (typically after 20-30 years), it loses its flexibility. A panel that survived a storm in 2015 might shatter if hit by a branch in April 2026.
Moisture and Mold: If you see green or black staining, it’s often more than a cleaning issue. Moisture trapped behind panels can lead to rot in the wooden sheathing, which is a much more serious vinyl siding repair than just fixing a surface crack.
Pest Entry: Small holes are like "Welcome" signs for Georgia pests. Carpenter ants, wasps, and even rodents can use these gaps to enter your wall cavities.
Essential Tools and Materials for Vinyl Siding Repair
Having the right gear makes the difference between a 20-minute fix and a weekend-long headache. If you’re planning a DIY vinyl siding repair, you’ll need a specific set of tools.
Most of these can be found at local hardware stores in Cumming or Peachtree City, but the "Zip Tool" is the one most homeowners don't already have in their garage.
Siding Removal Tool (Zip Tool): This is a small metal hook used to unzip the interlocking "buttlock" of the siding panels.
Aviation Snips: These are heavy-duty scissors designed to cut through vinyl without cracking it.
Utility Knife and Framing Square: For making precise scores and cuts.
Hammer and Pry Bar: Used for removing the roofing nails that hold the panels to the studs.
Roofing Nails: Use 1-1/4 inch or 1-1/2 inch galvanized nails to prevent rust streaks.
Sealants: Look for high-quality elastomeric caulks or specific vinyl patching compounds. Products like DAP Dynaflex Ultra are excellent because they remain flexible after drying.
Sandpaper: 220-grit is perfect for smoothing out patches before painting.
Safety Gear: Work gloves, safety glasses, and a respirator (especially if you're sanding or working around old insulation).
If the damage is smaller than an inch—think a hole from a rogue pebble or a small hairline crack—you don't necessarily need to replace the whole panel. A patch or a caulk-fill is often sufficient.
Prep the Surface: Clean the area around the hole with warm, soapy water and a microfiber cloth. Any dirt or grease will prevent the sealant from sticking.
Sand the Edges: Use your 220-grit sandpaper to smooth down any jagged edges around the puncture.
Apply the Sealant: Using a caulk gun, fill the hole with a waterproof, exterior-grade caulk. We recommend overfilling the hole slightly because some sealants shrink as they cure.
Smooth It Out: Use a putty knife or a damp rag to smooth the caulk so it sits flush with the siding texture.
Let It Cure: Depending on the humidity in Atlanta, this could take anywhere from an hour to a full day.
Painting Patches for a Seamless Finish
A challenge in vinyl siding repair is color matching. Even if you have the original color code, the siding on your home has likely faded from years of Georgia sun.
The Pro Tip: If you need a perfect match, take a small piece of the damaged siding (or a piece from an inconspicuous area like behind a bush or under a porch) to a local paint store in Norcross or Roswell. They can custom-match a "vinyl-safe" paint.
Type of Paint: Only use 100% acrylic latex paint. Avoid dark colors on light siding; dark paint absorbs more heat and can cause your patch to warp or the panel to buckle.
Application: Use a small brush to blend the paint over the patch, feathering the edges so it disappears into the surrounding texture.
Common Mistakes to Avoid During Vinyl Siding Repair
In our 12,000+ projects at Matt’s Exteriors, we’ve seen plenty of well-intentioned DIY fixes go wrong. Avoid these common pitfalls:
Nailing Too Tight: This is the cardinal sin of siding. Vinyl needs to "hang" on the nails. If you drive the nail head tight against the siding, the panel will buckle as soon as the temperature changes. Always leave about a 1/32-inch gap (roughly the thickness of a dime).
Ignoring the "1-Inch Rule": If a hole is larger than an inch, caulk won't hold up over time. You need to either use a vinyl patch kit or replace the section.
Mismatched Overlap: When installing a patch, ensure the top piece overlaps the bottom piece. Water should always run over the joints, not into them.
Skipping the Cleaning Step: Putting caulk over a dirty surface is a recipe for the patch falling off by next spring.
When a panel is severely cracked or warped, replacement is the only way to ensure your home remains protected. This process is often called "unzipping."
Unlocking the Panel: Insert the zip tool under the bottom edge of the panel above the damaged one. Hook the locking edge and pull down and out to unhook it.
Removing Fasteners: Once the upper panel is unzipped, you’ll see the nailing fin of the damaged panel. Use a pry bar to carefully pull out the roofing nails.
Cutting the Replacement: Measure the damaged area. If you’re replacing a section, cut the new piece so it overlaps the existing siding by at least 1 to 1-1/4 inches. For a full tutorial on the mechanics of this, How to Repair Vinyl Siding - This Old House is a fantastic resource.
Installing the New Piece: Slide the new panel into place. Lock the bottom edge into the panel below it.
Nailing: Drive nails into the center of the nailing slots every 12 to 16 inches. Remember: don't nail them tight!
Re-locking: Use your zip tool to pull the upper panel back down over the new nailing fin and snap it into place.
If this sounds a bit daunting, our team provides expert Siding Services to handle the heavy lifting for you.
When to Choose Vinyl Siding Repair Over Replacement
How do you know when a simple fix isn't enough? Consider these factors:
The 1-Inch Rule: Small holes can be patched. Large cracks or holes over 1 inch usually require a new panel.
Widespread Damage: If more than 15-20% of a wall is damaged, it’s often more cost-effective to look into a full replacement.
Age and Brittleness: If the siding cracks just by you touching it, it’s past its lifespan.
Underlying Issues: If you see signs of rot on the wood behind the vinyl, the siding must come off to fix the structure.
How to Safely Remove and Reinstall Siding Panels
Safety is paramount, especially if you’re working on a two-story home in Johns Creek or Suwanee.
Zip Tool Technique: Always pull with a steady, downward pressure. Jerking the tool can tear the vinyl.
Sliding Motion: When installing a new piece, sliding it horizontally into the J-channels at the corners is often easier than trying to pop it straight on.
Expansion Gaps: Leave about 1/4 inch of space at the ends of the panels where they meet corner posts or J-channels. This allows the siding to expand in the summer heat without hitting the trim and buckling.
Advanced Fixes: Corner Posts and Safety Precautions
Corner posts are the "backbone" of your siding system. They are often the first things hit by cars in driveways or damaged by weed eaters.
Repairing a corner post is tricky because they are usually installed before the siding. To fix one without removing all the siding:
Cut away the damaged face of the corner post with your utility knife, leaving the nailing fins intact.
Take a new corner post and cut off the nailing fins, leaving just the "shell."
Apply a bead of high-quality sealant to the old fins.
Snap the new shell over the old one and secure it with a few small stainless steel screws or rivets in inconspicuous spots.
Safety Tips for DIY Vinyl Siding Repair
Working on your home's exterior involves risks, particularly at heights.
Ladder Stability: Always use a ladder on level ground. Have a helper hold the base if you're going above the first floor.
Electrical Lines: Be extremely cautious when working near where the power lines enter your home.
Respirator Use: If you are removing old siding that might have mold or old insulation behind it, wear a respirator.
April 2026 Standards: Ensure your ladder is rated for your weight plus your tools. Modern safety standards recommend using scaffolding for any work that requires you to reach significantly to the side of your ladder.
Professional vs. DIY: Costs and Maintenance
Is it worth doing it yourself? Let’s look at the numbers for a typical Atlanta home in 2026.
Factor DIY Repair Professional Repair Material Cost $50 - $150 Included in quote Labor Cost $0 (Your time) $100 - $300 (Small jobs) Tools Needed $40 - $100 Pros bring their own Warranty None Workmanship Warranty Time Investment 2 - 6 hours 1 - 2 hours
The best vinyl siding repair is the one you never have to do.
Annual Inspections: Walk around your home every spring. Check for loose panels or small cracks.
Cleaning: Use a solution of 70% water and 30% white vinegar. It kills mold and mildew without damaging the vinyl or your landscaping. Avoid high-pressure power washing, which can force water behind the panels.
Vegetation Trimming: Keep bushes and trees at least 12 inches away from your siding to prevent scratches and moisture trap.
Post-Storm Checks: After a heavy Georgia thunderstorm, check for impact damage or panels that may have "unzipped" in high winds.
Frequently Asked Questions about Vinyl Siding Repair
How much does it cost to repair a single piece of vinyl siding?
If you're doing it yourself, the cost is simply the price of the panel (usually $15-$30) and a few tools. Professionals typically charge a minimum service fee, which in the Atlanta area ranges from $100 to $250 depending on the height and complexity of the repair.
Can I use standard exterior paint on my vinyl siding patches?
No. You must use paint specifically formulated for vinyl. Standard exterior paints can crack as the vinyl expands and contracts. Look for "vinyl-safe" labels that use urethane and acrylic resins for better adhesion and flexibility.
How long does vinyl siding typically last in the Atlanta climate?
With proper maintenance, high-quality vinyl siding can last 20 to 30 years. However, in the intense humidity of areas like Fayetteville or Hampton, you may see signs of aging or "chalking" sooner. Regular cleaning and prompt vinyl siding repair can extend this lifespan significantly.
Conclusion
Your home's siding is its first line of defense. Whether you’re dealing with a small crack from a lawnmower or widespread storm damage, addressing vinyl siding repair promptly is the key to maintaining your home's value and structural integrity.
While many small fixes are well within the reach of a determined DIYer, complex repairs or high-altitude work are often best left to the experts. At Matt’s Exteriors, we’ve been helping homeowners across Metro Atlanta—from Senoia to Woodstock—restore their curb appeal and protect their investments since 2007.
If you’re unsure about the state of your siding or need a professional eye to check for hidden moisture damage, we’re here to help. Explore our full range of Siding Services or contact us today to schedule an inspection. Let's make sure your home stays beautiful and bone-dry for years to come!