
Get Your Instant Quote Now!
Get Started
Wood siding installation is the process of attaching natural or engineered wood boards to the exterior of your home to protect it from the elements while giving it a timeless, classic look.
Here's a quick overview of how it works:
Wood siding has been dressing up American homes for centuries - and for good reason. It's beautiful, naturally insulating, and when installed correctly, it lasts for decades.
But here's the thing: done wrong, it's one of the most expensive mistakes you can make on your home's exterior.
Improper installation leads to moisture getting trapped behind boards, wood rot, warping, and costly repairs. According to the 2024 Remodelling Cost vs. Value Report, siding replacement can recover up to 80% of its cost in resale value - but only if the job is done right.
For Metro Atlanta homeowners, the stakes are especially high. Georgia's heat, humidity, and seasonal storms put real pressure on exterior materials. A poorly installed wood siding system won't just look bad - it can lead to water damage, mold, and structural problems that go far deeper than the surface.
This guide walks you through every step of the process, from receiving your materials to the final coat of sealant.
Before we even touch a piece of cedar or pine, we need to make sure we have the right arsenal. Wood is a living material; it expands, contracts, and reacts to the environment. Using the wrong tools isn't just a minor inconvenience—it can actually damage the wood fibers and lead to premature failure.
For a professional-grade wood siding installation, you'll need:
If this list feels a bit daunting, don't worry. You can always explore our siding services to see how our pros handle these high-performance tools.

One of the biggest mistakes we see in Metro Atlanta is homeowners taking delivery of wood and installing it the very next day. Wood needs to "breathe" and adjust to the local humidity levels of your specific neighborhood—whether you're in Marietta or McDonough.
The Acclimation Rule: You must un-bundle the siding and let it sit for 10 to 14 days before installation. This prevents the boards from cupping, warping, or buckling once they're on your house.
Storage Best Practices:
According to the Harvard Joint Center for Housing Studies, Americans spent over $500 billion on home improvements in 2023, and a big chunk of that goes toward exterior upgrades. To make sure your budget stays on track, you need an accurate material estimate.
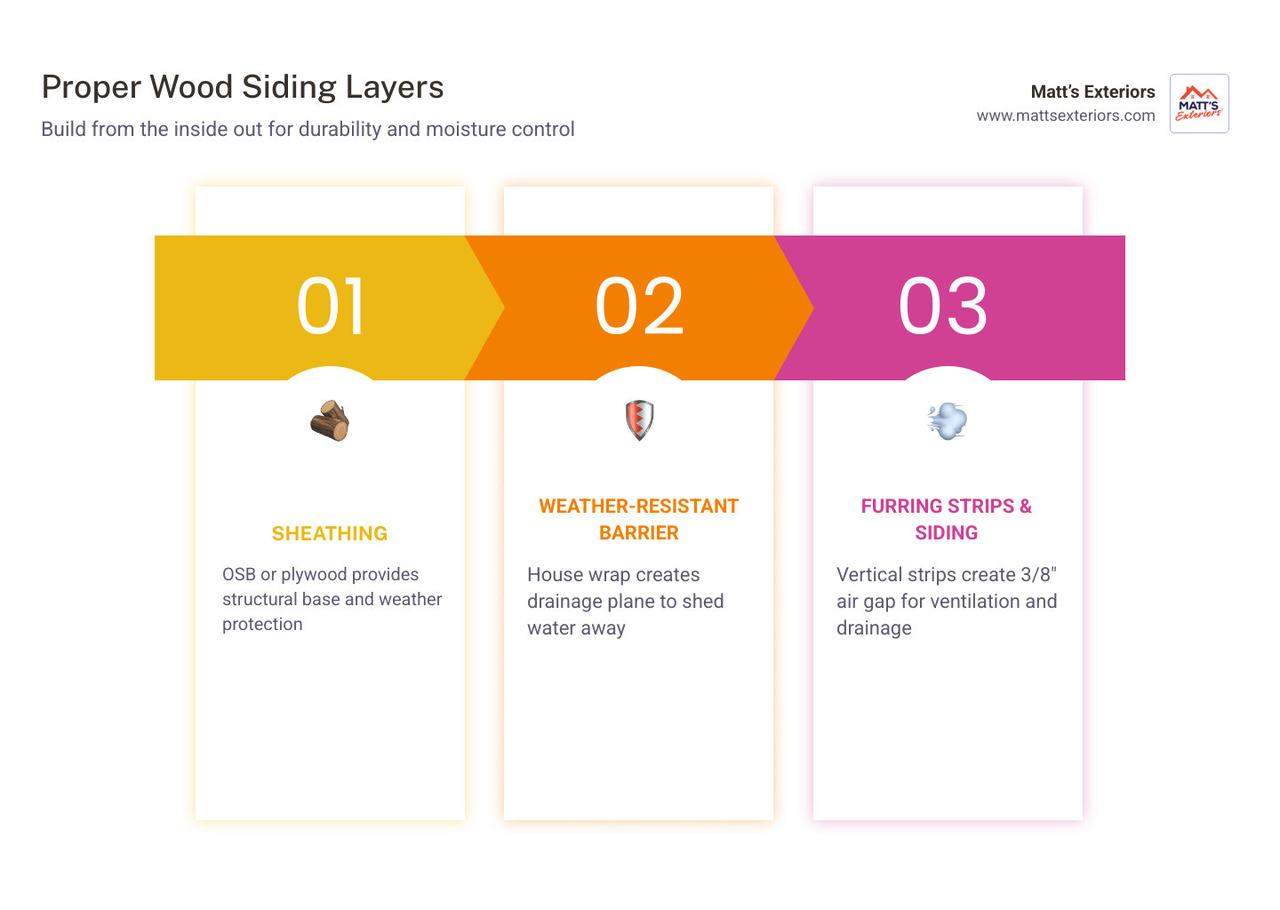
In our humid Georgia climate, moisture is the enemy. Modern building science tells us that water will eventually get behind your siding—through wind-driven rain or condensation. The goal of a proper wood siding installation is to give that water a way out.
Before the first board goes up, we inspect the sheathing. Whether it's OSB (Oriented Strand Board) or CDX Plywood, it must be dry and structurally sound. If we find rot, we replace it immediately.
We highly recommend a rainscreen system. This involves installing furring strips (usually 1.5" to 3" wide and 3/8" thick) over your house wrap.
Don't forget the insect screens! We use products like Cor-a-vent at the top and bottom of the wall to keep bugs out while letting air flow freely. As noted by the U.S. Department of Energy, properly managed exterior envelopes can even help reduce heating and cooling bills by up to 20%.
Flashing is your last line of defense. We install Z-flashing over horizontal seams and drip caps over every window and door header.
The "shingle effect" is the golden rule: the piece above must always overlap the piece below. We seal edges with high-quality caulk, but we never rely on caulk alone to keep water out. You can see examples of our meticulous flashing work in our project gallery.
Now for the satisfying part. We start by snapping a level chalk line around the base of the house. If your first row is even 1/8th of an inch off, by the time you reach the roofline, your siding will look like a roller coaster.
Feature Solid Wood Engineered Wood Fiber Cement Aesthetic Authentic, natural grain Very realistic Mimics wood well Maintenance High (Paint/Stain 3-5 yrs) Moderate Low Durability Vulnerable to insects/rot Highly resistant Fire/Rot proof Installation Traditional carpentry Lightweight/Fast Heavy/Special tools
Windows and doors are the most common failure points. We leave a 1/2-inch clearance between the siding and the window trim. This gap is later filled with a backer rod and high-quality sealant.
We miter cut our trim for a tight, professional look, and we always prime the "end grain" of every cut. The end of a board is like a bunch of tiny straws—if you don't seal it, it will suck up water and rot from the inside out. If you're unsure about tackling these tricky details, contact us for an estimate.
The style you choose dictates the installation method. While horizontal lap siding is classic, many homeowners in Alpharetta and Roswell are moving toward more textured looks.
Board and batten is a 200-year-old style that has made a massive comeback. It consists of wide vertical planks (the "boards") with thin vertical strips (the "battens") covering the seams.
Corners can be finished in two ways:
Your wood siding installation isn't finished until it's protected. Unless you're using a naturally rot-resistant wood like Accoya or Western Red Cedar and want it to "silver" naturally, you need a finish.
To keep your 80% ROI intact, follow this schedule:
Beyond the beauty, wood siding is a smart financial move. It acts as a natural insulator, reducing "thermal bridging" (heat loss through the wall studs). When combined with modern house wraps, it can lead to 20% energy savings in older homes.
As the 2024 Remodelling Cost vs. Value Report highlights, exterior upgrades are among the top ways to increase your home's resale value in the Atlanta market.
We recommend 10 to 14 days. The wood needs to reach a moisture content that matches the local environment. Installing "wet" wood leads to gaps when it dries; installing bone-dry wood can lead to buckling when it rains.
Always use 316-grade stainless steel ring-shank nails. They provide the best grip and will never rust or react with the wood's natural chemicals.
You can, but we don't recommend it. Installing over furring strips (a rainscreen) is the gold standard. It prevents the wood from sitting against a damp vapor barrier, which is a leading cause of rot.
At Matt’s Exteriors, we’ve seen it all since we started in 2007. With over 12,000 projects completed across Metro Atlanta—from Suwanee to Peachtree City—we know that a successful wood siding installation comes down to the details. It’s about more than just nailing boards to a wall; it’s about protecting your biggest investment with high-quality workmanship and trusted materials.
Whether you're looking for the rustic charm of cedar lap or the bold lines of board and batten, our family-owned team is here to help. Ready to transform your home's exterior? Schedule your wood siding installation today and let us give your home the classic look it deserves.