
Get Your Instant Quote Now!
Get Started
Installing J-channel for soffit is one of those jobs that looks simple but has real consequences if done wrong — water damage, sagging panels, pest entry, and poor attic ventilation can all follow a bad install.
Here's the quick answer if you need it fast:
How to install J-channel for soffit (quick overview):
But the details — expansion gaps, corner miters, channel type, fastener depth — are what separate a lasting install from one that fails in a season.
Soffit does more than look good. It protects your rafters from moisture, keeps pests out of your attic, and supports the airflow that prevents heat buildup and ice dams. Getting the channel work right is the foundation of all of it.
I'm Matt Lopez, founder of Matt's Exteriors, and after nearly two decades of exterior remodeling across Metro Atlanta, I've overseen hundreds of soffit and fascia projects — including installing j channel for soffit on everything from new builds in Peachtree City to full eave restorations in Marietta. In this guide, I'll walk you through exactly how we do it right the first time.
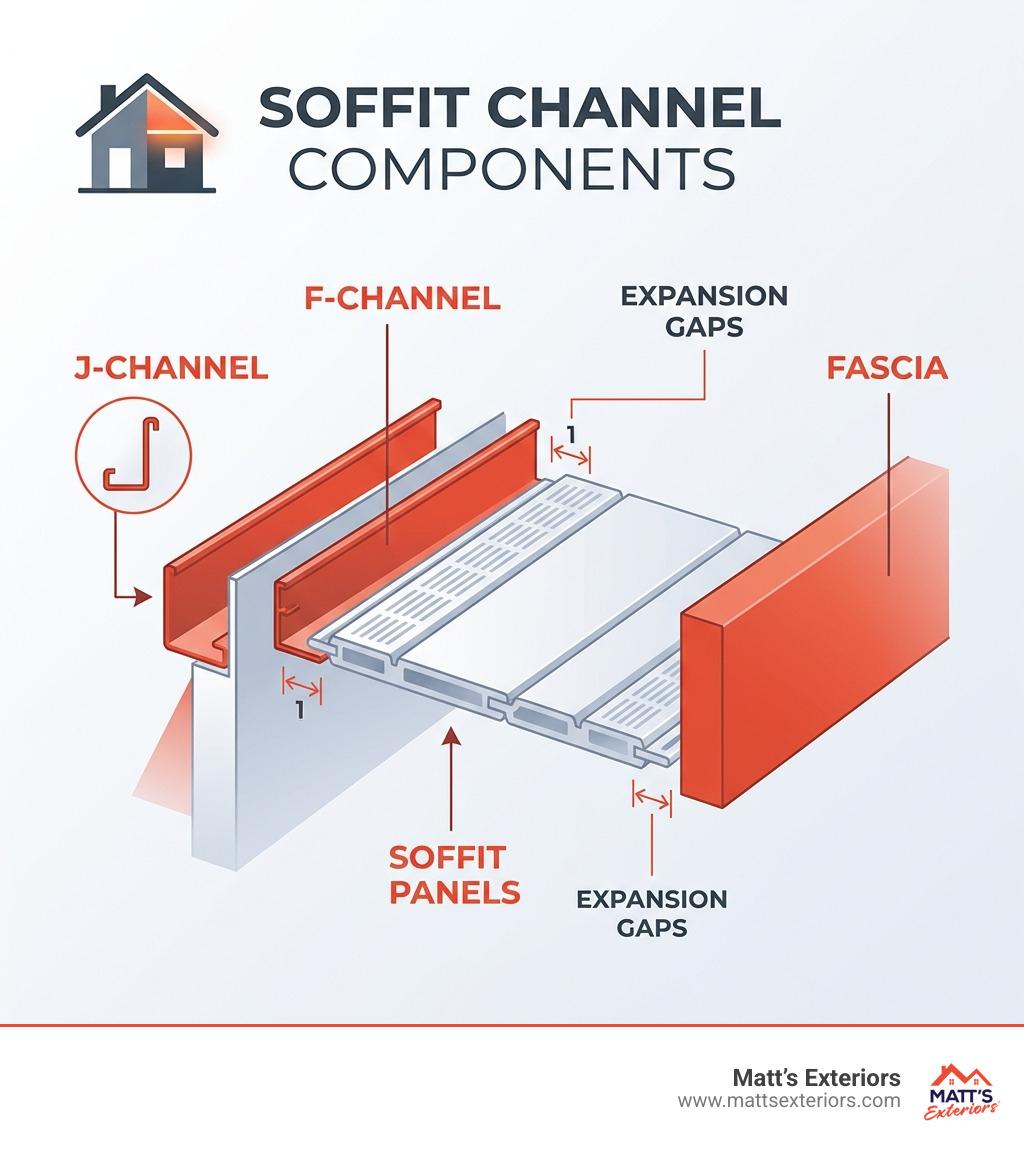
When we talk about installing j channel for soffit, we are talking about the "receiver" that holds your soffit panels in place. Think of it as the frame of a picture. Without a sturdy, level frame, the "picture" (your soffit) will sag, rattle, or fall out entirely.
J-channel is named for its shape. It features a long mounting flange and a curved "hook" that creates a channel to hide the cut ends of your soffit panels. Its primary purpose is to provide a clean, finished edge and to support the weight of the panels. In many Exterior House Siding projects, J-channel is the go-to choice for renovations because it can be nailed directly into existing wood or old soffit materials.
While they perform similar roles, the installation method differs significantly.
For a deeper dive into how these components integrate with your overall roofline, check out the Soffit Installation Guide.
You can't achieve professional results with a hammer and a prayer. To do this right, you’ll need a specific set of tools. We’ve found that using the right fasteners is often the difference between a soffit that stays put and one that rattles every time the wind blows through Kennesaw.
If you’re wondering about the specifics of fastening, How to Screw a J-channel to Hold Soffit provides excellent technical insights into screw placement. For those in the Metro area looking for professional help, our Siding Installation Atlanta team uses these exact tools every day.
Now, let’s get into the "how-to." Whether you are in Woodstock or McDonough, the physics of a house remain the same. You need level lines and room for the house to breathe.
Most J-channel comes in 12-foot lengths. While it’s tempting to just slap it up, you need to account for the "movement" of the material.
For more detailed technical drawings on cutting, the Georgia-Pacific Installation Guide is a fantastic resource.
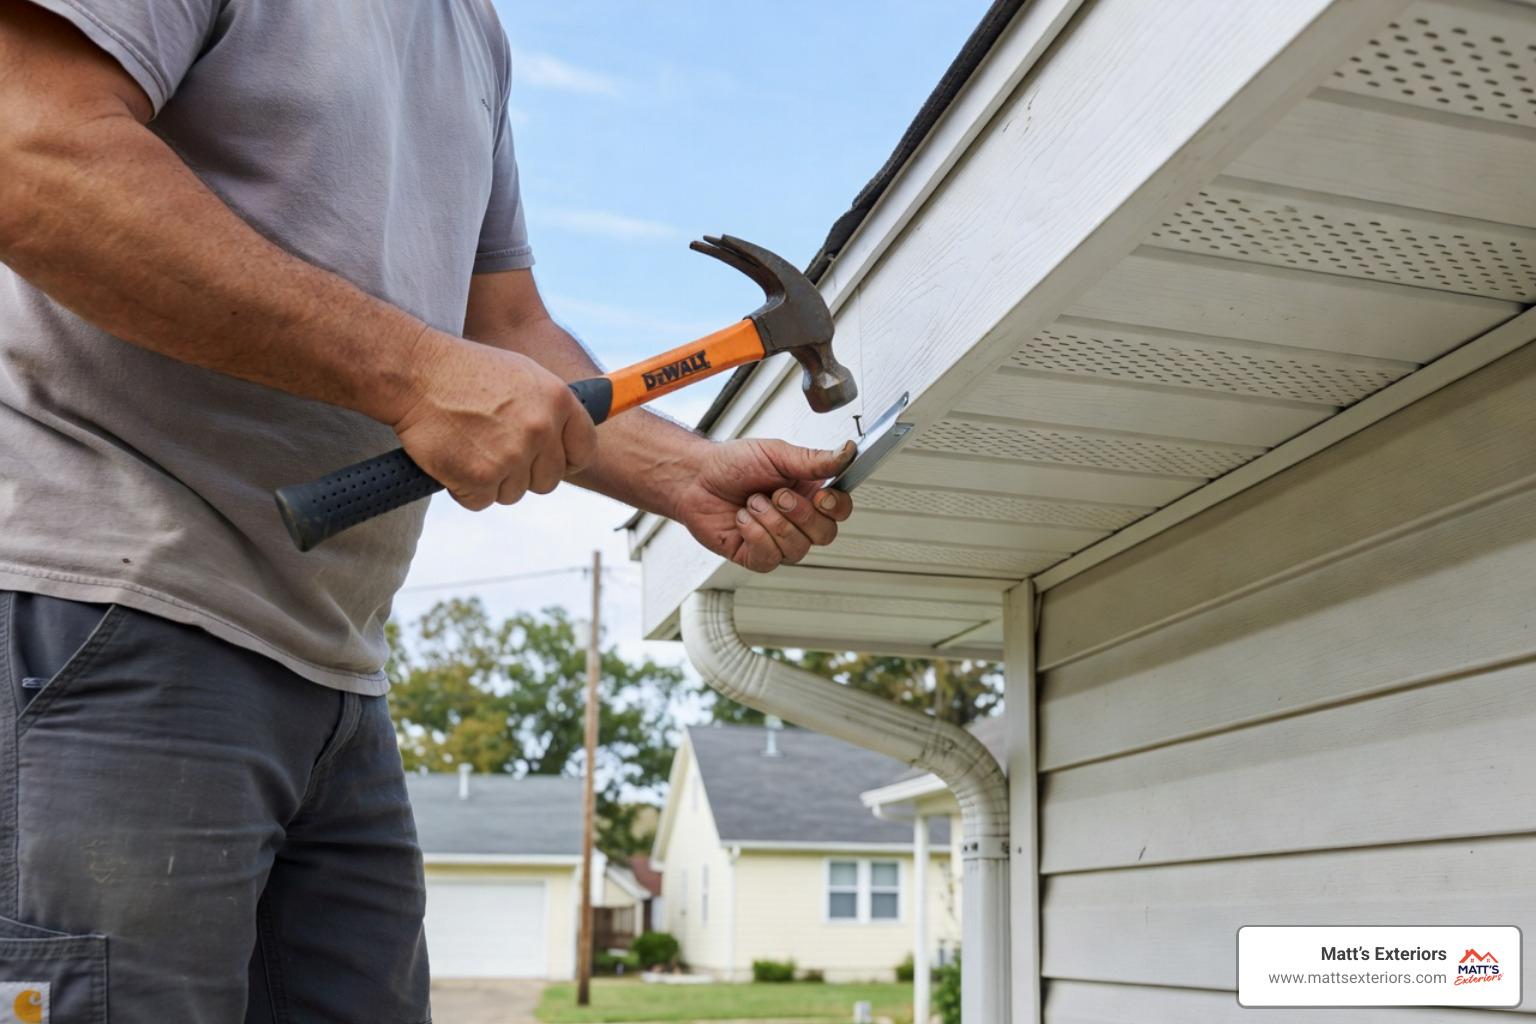
Once your pieces are cut, it’s time to mount them. This is where most DIYers make their biggest mistake: they nail it too tight.
Our Siding Services page details more about how we ensure these technical standards are met on every job. You can also follow these 5 Easy Steps: How to Install J Channel for Soffit Installation Guide for a simplified walkthrough.
The straight runs are easy. The corners and peaks are where the pros earn their keep.
Corners are the primary entry point for water and pests. To handle them correctly:
If you are working with older homes in places like Newnan or Senoia, you might be dealing with Wood Siding Installation issues simultaneously, making these corner transitions even more critical.
Sometimes you’re in the middle of a job in Sandy Springs and you realize you need an F-channel but only have J-channel on the truck. You can modify it!
This is a common trick used when Replacing Wood Siding On House structures where the original eaves weren't designed for modern vinyl or aluminum systems. For a comprehensive look at these modifications, see the Complete Guide to J Channel Soffit Installation.
After 12,000+ projects, we’ve seen it all. Here are the "don'ts" that will save you a massive headache:
Doing it right the first time is why we can offer things like a Lifetime Warranty Siding Atlanta homeowners trust.
Yes, you can. In fact, for many remodels in the Atlanta area, we install J-channel directly onto the old wood soffit or the fascia board to provide a clean mounting point for new, vented aluminum panels. Just ensure the underlying wood is structurally sound.
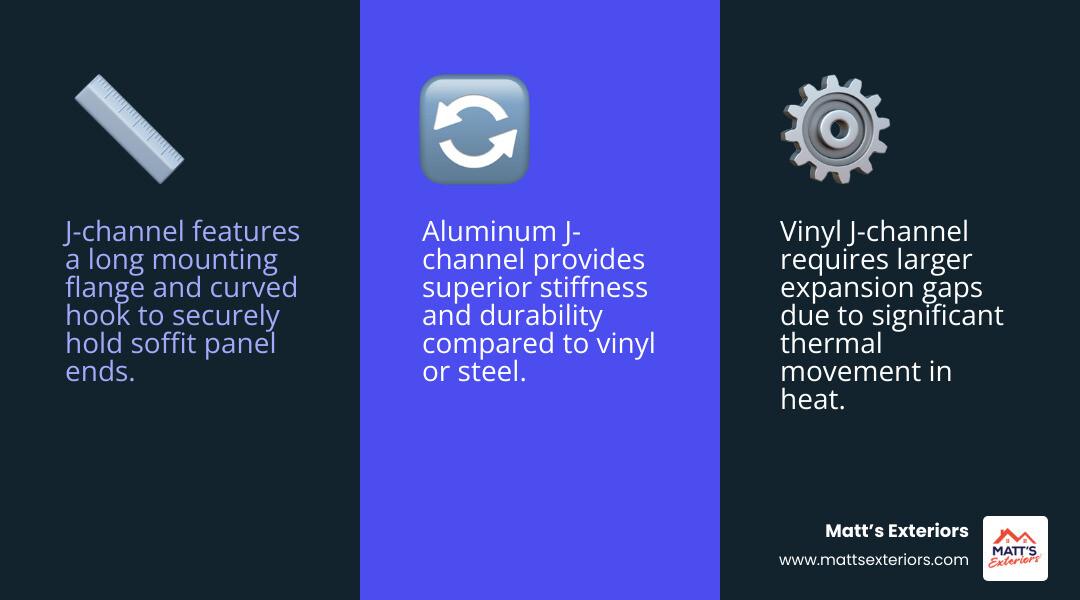
While roofing nails work, we prefer #6 x 5/8" stainless steel or galvanized flat head screws. They offer better "bite" and won't back out over time due to the vibrations caused by wind or temperature changes.
The key is the overlap and the sealant. Ensure your overlaps are at least 2 inches (4 is better) and apply a bead of high-quality exterior caulk at the junctions where the channel meets the house or the fascia.
Installing J-channel for soffit is a foundational skill for any exterior renovation. Whether you’re looking to boost your curb appeal in Peachtree City or protect your investment in Alpharetta, getting the channel installation right ensures your soffit stays level, looks professional, and protects your home from the elements for decades.
At Matt’s Exteriors, we take pride in the small details. From the 1/4-inch expansion gap to the perfect 45-degree mitered corner, our family-owned team treats every home like our own. If you’re ready to Transform Your Home With Quality Siding and soffit, we’re here to help. Serving Metro Atlanta since 2007, we have the experience and the local knowledge to ensure your home stands the test of time. Reach out to us today for an estimate and let's get your home's exterior looking its absolute best!