
Get Your Instant Quote Now!
Get Started
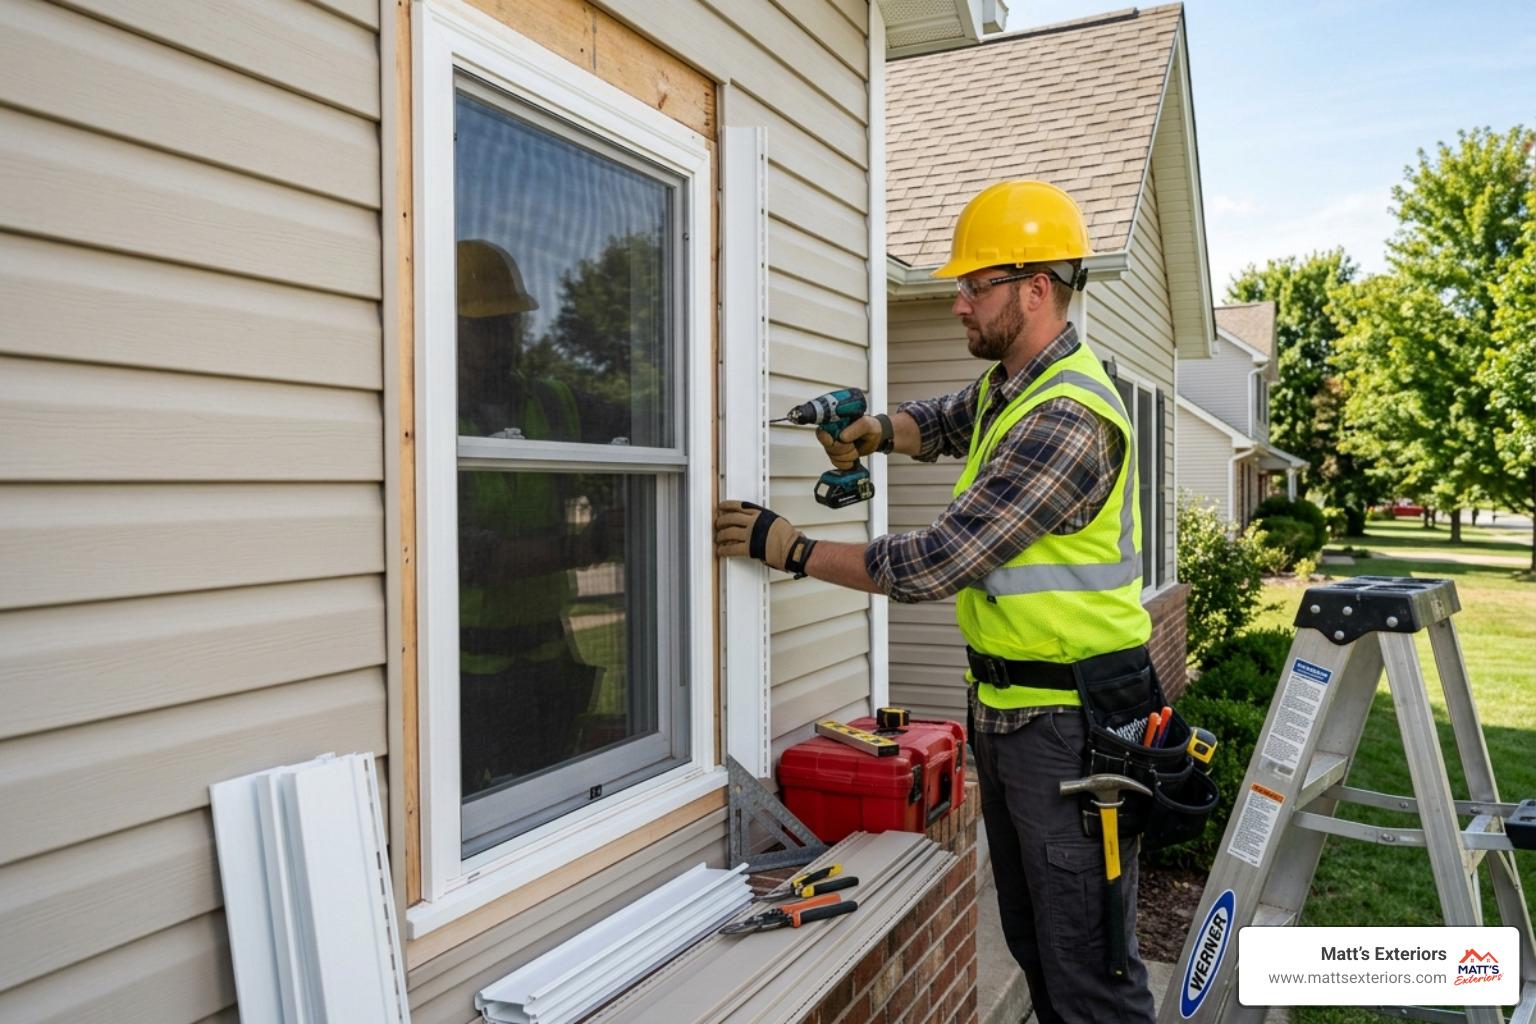
Installing J-channel for vinyl siding is one of the most important steps in any exterior remodel — and one of the most misunderstood.
Here's what you need to know right away:
How to install J-channel for vinyl siding (quick overview):
That order isn't just a suggestion. It's what keeps water out of your walls.
J-channel is the L-shaped trim piece that frames windows, doors, soffits, and anywhere a siding panel needs a clean edge. It hides raw cut edges, gives siding panels somewhere to terminate, and — when installed correctly — acts as your home's first line of defense against water intrusion. When it's done wrong, water sneaks behind the siding and starts rotting your wall sheathing before you ever notice a problem.
I'm Matt Lopez, founder of Matt's Exteriors, and after nearly two decades of installing and inspecting vinyl siding systems across Metro Atlanta, I've seen how improper J-channel installation leads to costly repairs — and how mastering the technique of installing J-channel for vinyl siding protects your home for decades to come.
Before we get our hands dirty, we need the right gear. If you’ve ever tried to cut vinyl with a dull pocket knife in the middle of a Georgia summer, you know that the right tools make the difference between a professional finish and a jagged mess.
To do this right, you’ll need:
When selecting your J-channel, ensure the pocket depth matches your siding thickness (usually 1/2-inch to 3/4-inch). You can find more details on accessory specs in the Vinyl Siding Accessories Installation Guide | PEPA. If the list of tools looks a bit daunting, don't worry—our team at Matt's Exteriors provides full Siding Services to handle the heavy lifting for you.
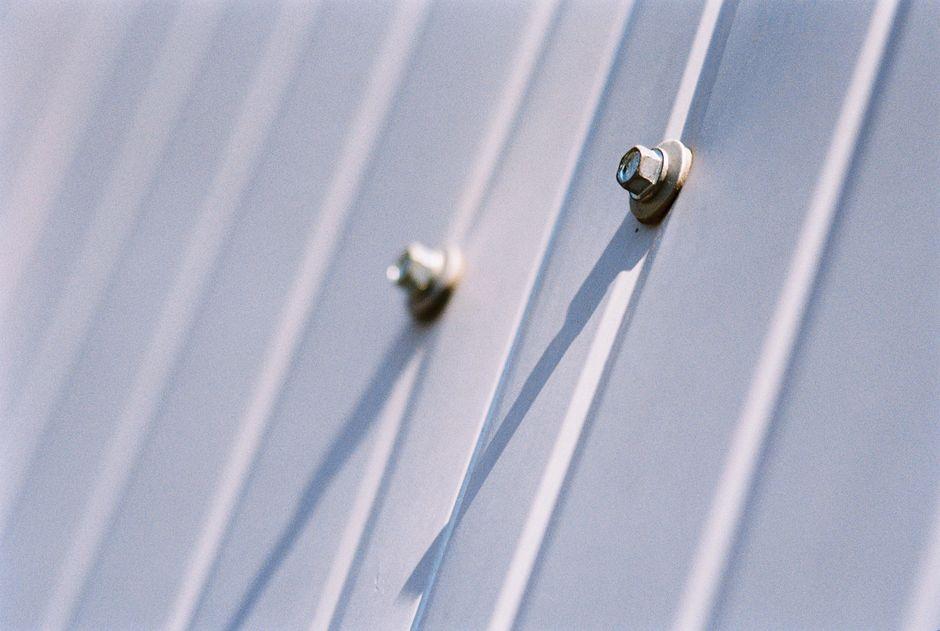
At Matt's Exteriors, we live by the "Watershed Principle." Think of your home’s exterior as a series of shingles. For water to stay out, the piece above must always overlap the piece below.
When installing j channel for vinyl siding, water management is the primary goal. J-channel is not a waterproof seal; it is a water diverter. Water will inevitably get into the J-channel pocket. The goal is to make sure that once it's in there, it has a clear, downhill path to the ground without touching your wooden wall studs.
If you reverse the overlaps—say, putting the bottom piece over the side pieces—you’ve created a funnel that directs rainwater straight into your window casing. This leads to rot, mold, and expensive structural repairs. Following the correct sequence ensures your Exterior House Siding remains a shield rather than a sponge. For a deeper dive into why this layering is non-negotiable, check out this guide on Installing J-Channel for Vinyl Siding around Windows - Fine Homebuilding.
Now, let’s get into the nitty-gritty. Whether you’re in Alpharetta or Fayetteville, the steps for installing j channel for vinyl siding remain the same. We’ll work in a specific order: Bottom, then Sides, then Top.
Before you nail anything, remember the "dry fit" rule. Hold your pieces up to the window to ensure your cuts are crisp and your measurements account for the overlaps. This prevents the "oops, I cut it too short" moment that leads to a wasted piece of vinyl. For more visual learners, How To Install Vinyl Siding With A J-Channel offers a great supplementary look at the process.
The bottom piece goes in first. It should be cut to the exact width of the window frame. However, because this piece will inevitably collect water from the side channels, it needs a way to let that water out.
We create weep notches. Every 6 to 8 inches along the bottom of the J-channel, use your snips to cut a small "V" or a slit. This allows any moisture that enters the side channels to drain out onto the siding panel below rather than sitting in the channel and stagnant water is the enemy of your home's longevity. If you're looking for professional Siding Installation Atlanta, we always ensure these drainage paths are clear.
Next come the side pieces (the jambs). These need to be cut roughly 2 inches longer than the height of the window. Why? Because we need an extra inch at the top and an extra inch at the bottom for overlapping.
At the bottom of the side J-channel, cut a 1-inch "tab" out of the back leg. You will then fold this tab inward so it sits inside the bottom (sill) J-channel. This creates a "bridge" for water to flow from the side channel into the bottom channel without leaking behind the trim. If you've noticed water damage around your windows already, you might need Siding Repair Atlanta to fix the underlying structure before installing new trim.
The top piece (the header) is the most complex. Cut it 2 inches wider than the window opening.
Now, when rain hits the top of the window, it runs into the top J-channel, flows across to the ends, follows the drip flaps into the side channels, and eventually exits through the weep notches at the bottom. It’s a complete, closed-loop drainage system. This attention to detail is why we offer Lifetime Warranty Siding Atlanta — because we know it’s done right.
Vinyl is a "living" material. It expands when the Georgia sun beats down on it in July and contracts when the temperature drops in January. If you nail it tight, it will buckle, warp, and look like a roller coaster within a year.
The Golden Rules of Nailing:
For more technical specs on fastening, the experts at Fine Homebuilding have excellent diagrams on nail placement.
Sometimes, J-channel isn't the right tool for the job. Specifically, when you reach the very top of a wall (under the soffit) or directly under a window sill, you often have to cut the "nail hem" off your siding panel.
Without a nail hem, you can't nail the siding in place. This is where undersill trim (also called utility trim) comes in. You nail the undersill trim inside the J-channel or directly to the wall. Then, you use your snap-lock punch to create tabs on the cut edge of the siding. These tabs "snap" into the undersill trim, holding the siding securely without visible nails.
We often help homeowners decide between these options to ensure Long Lasting Curb Appeal.
Remember: J-channel is the trim, not the seal. Before installing j channel for vinyl siding, your home should be wrapped in a Water-Resistive Barrier (like Housewrap) and the window should be properly flashed with high-quality flashing tape.
The J-channel sits on top of these layers. If you find rot while removing old trim, it’s vital to Replace Exterior Wood Siding and fix the flashing before the new vinyl goes on.
Yes, but it requires a bit of finesse. You’ll need a zip tool (also known as a Sideswiper). This tool allows you to "unzip" the locking leg of the siding panels above the window so you can reach the nailing flange.
In some cases, you can trim the perforated nailing edge of the new J-channel and slide it behind the existing siding, but we generally recommend unzipping the siding to ensure you can nail the new J-channel securely. For a DIY perspective on this, Upgradedhome.com has a great guide on retrofitting.
No. This is perhaps the most common mistake we see. Many well-meaning DIYers think they are helping by sealing the corners with caulk. In reality, you are trapping water inside the channel. Vinyl siding is designed to be a "vented" system. Water needs to be able to flow through the channels and out the bottom. Caulking these joints leads to stagnant water and rot.
While we're on the topic of aesthetics, choosing the Best Sheen For Siding can help your trim blend seamlessly without the need for messy sealants.
When a siding run meets a roofline (like on a dormer), the J-channel should be installed about 1/2-inch to 1-inch above the roofing material. This prevents the channel from "wicking" water off the roof and allows for debris (like pine needles) to wash away.
Where two J-channels meet at a 90-degree angle (like a door frame meeting a deck), you have two choices:
Feature Mitered Joint Butt Joint Appearance Professional "Picture Frame" look Functional, less decorative Difficulty Higher (requires precise 45° cuts) Lower (square cuts) Water Management Excellent (if flaps are used) Good (if flashed correctly) Best For Windows and Front Doors Utility doors, rooflines, and decks
Installing J-channel for vinyl siding is a masterclass in details. While it might seem like a simple piece of plastic trim, its role in protecting your home from the unpredictable Georgia weather is massive. By following the watershed principle—overlapping top-over-sides and sides-over-bottom—and allowing for thermal expansion, you ensure your home stays dry and beautiful for years to come.
At Matt's Exteriors, we've completed over 12,000 projects since 2007, serving families from Woodstock to McDonough. We take pride in the "small things" like weep notches and drip flaps because we know they aren't small things at all—they are the things that protect your biggest investment.
If you’re ready to Transform Your Home With Quality Siding but want to leave the technical miters and flashing to the pros, we’re here to help. Contact us today for a consultation on our full suite of Siding Services. Let’s give your home the clear, professional view it deserves!